
BUILD STORY // POCKETSTAND // RELEASE 1.1
PocketStand: Six Revisions to a Folding Phone Stand
A small phone stand. Six revisions. Quite a few reminders that a hinge looking attached on a screen does not mean it plans to stay attached in real life.
What came off the printer
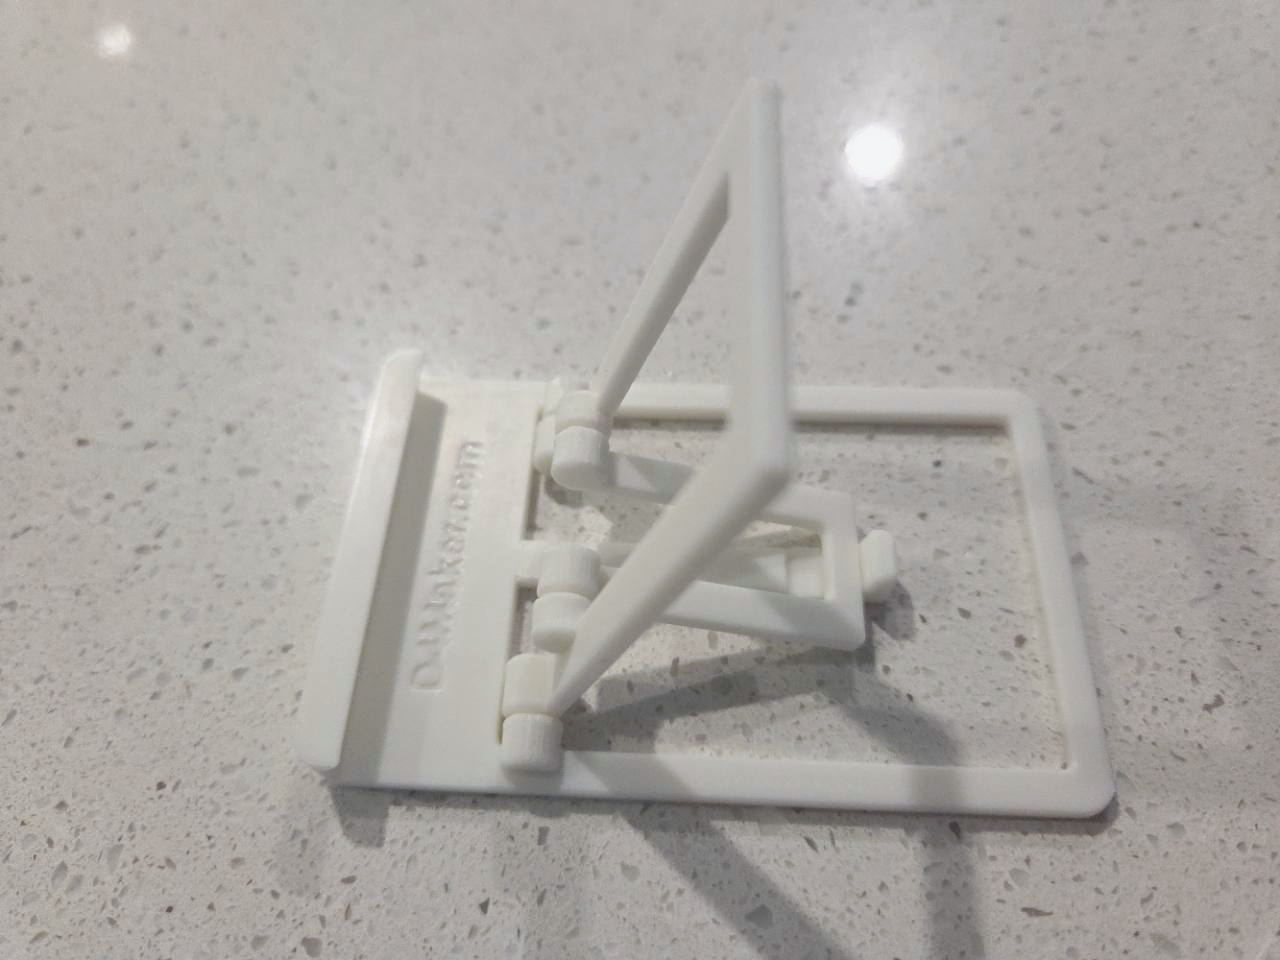
PocketStand folds into its own frame and prints in place, with no loose hinge pins to install. The released version has a 9 mm retaining lip with a 45° inward upper return. The photos here show that actual white PLA print, including a cased phone in landscape.
Plain and recessed D4Maker.com versions are on Creality. Phone and case shapes vary; the landscape photos do not prove every portrait setup will stay put.
THE BRIEF CHANGED WHEN THE PLASTIC ARRIVED
It started as a wallet-card idea.
The early V0.1 brief was ambitious: a phone stand with a credit-card footprint, genuinely thin enough for a wallet, made from PLA and without repeatedly bending a thin plastic hinge. There was a compact keyring idea in that brief too.
The first digital work made the compromises much clearer. Loose pieces were not the experience I wanted. A reference image helped explain the direction: an outer frame with the phone backing and brace tucked inside it. The stand needed to open as one little object, rather than become a pocket-sized assembly job. That reference helped communicate the idea; its geometry was not copied.
MakerMouse, my AI assistant, helped turn the feedback into a model with editable dimensions and keep track of the changes. I did the printing, trying phones and reporting what actually happened.
The first useful print worked. Then the hinges fell out.
That was progress, oddly enough. The stand opened and held a phone, so there was something real to improve. The short male ends of the hinges could come out of their sockets, though, and the central catch sat too low compared with the hinges and front lip.
The next changes were practical: make the hinge ends longer, raise the catch and give the phone backing more reach. When I said the inner U-shaped backing needed to be taller, I meant longer in the flat layout, not thicker. There was about 3 mm of unused space at its end that could become useful backing for a portrait phone.
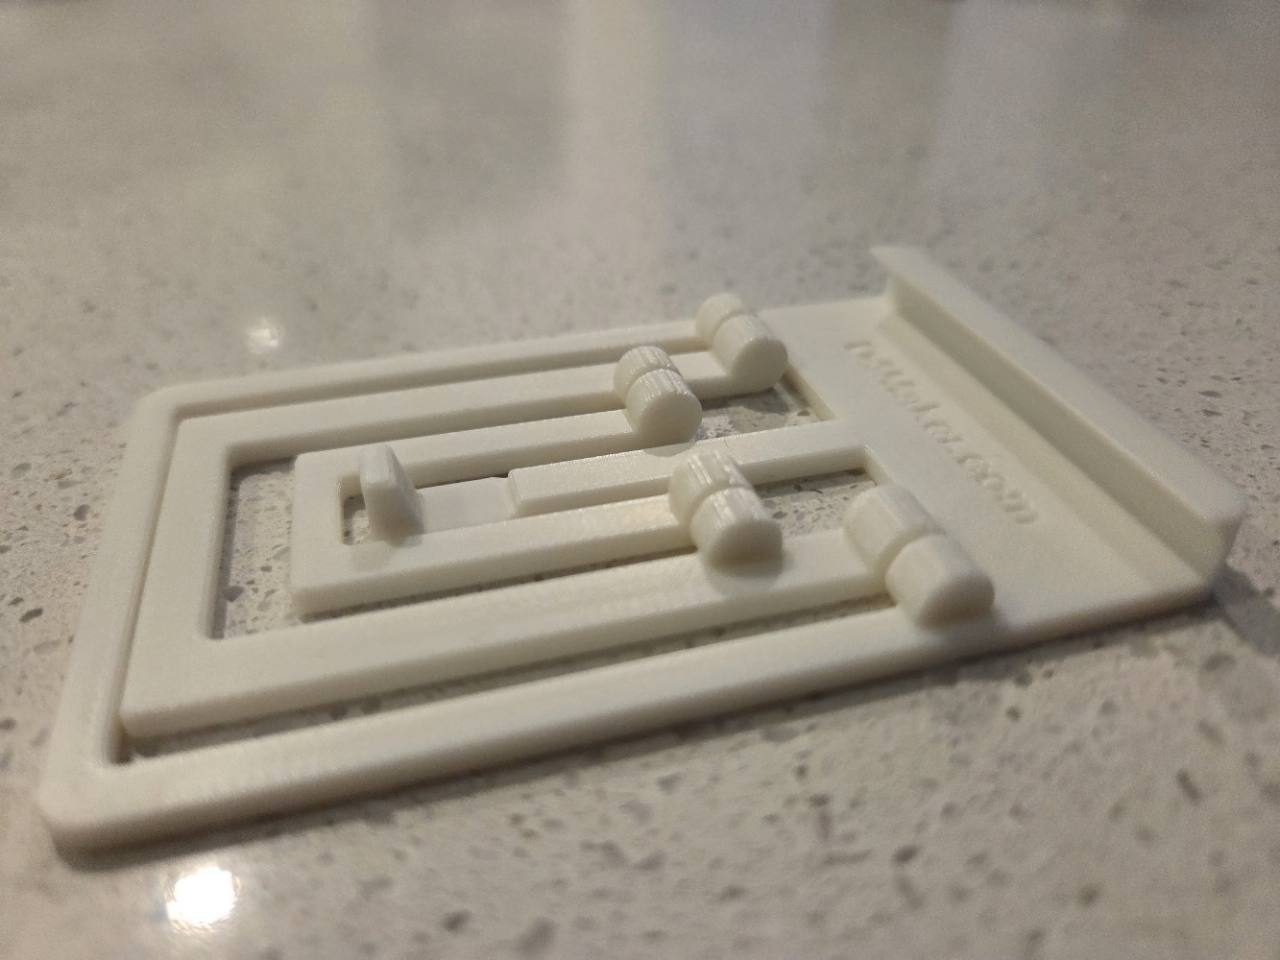
The longer hinge ends helped. I reported that the next print’s hinges seemed stronger and were less prone to falling out, although deliberately pushing to release them could still separate them. Better was a useful result; it was not the same thing as impossible to pull apart.
A fraction of a millimetre can be worth another print.
There was still too much empty space between parts that could have been helping support each other. I widened the outer frame inward, adjusted the backing and widened the central catch a little. The flat body moved to 2.6 mm, with the thin floor underneath the catch kept at 1.6 mm.
Those small changes were about putting plastic where it helped. Making every part chunky would have been easy, but keeping the stand light, quick to print and economical with filament was part of the point.
The front lip needed attention as well. I did not want it looking like a bar stuck on top. It needed to rise naturally from the end of the base. A broad ramp behind it did not seem to help the phone stay put, so that went. Rounded corners and chamfered edges—the little bevels that take the sharpness off—made the stand feel more finished.
The lip became the last little argument with the phone case.
The 7 mm version was much more stable. It even printed successfully through the cloud workflow, which was a welcome result. Portrait grip with a case was still a bit flaky, though.
My suggestion was another 2 mm of lip height, curving outward lower down and back inward at the top. The idea was to give the bottom of the phone somewhere to sit while the top edge helped stop it escaping.
The resulting upper return was steeper than I first pictured: 45°, not 15°. I noticed it in the preview and printed it anyway to see how it behaved. That is the 9 mm version photographed here and released on Creality. The central catch also finished at 6.4 mm wide, another 0.2 mm on each side.
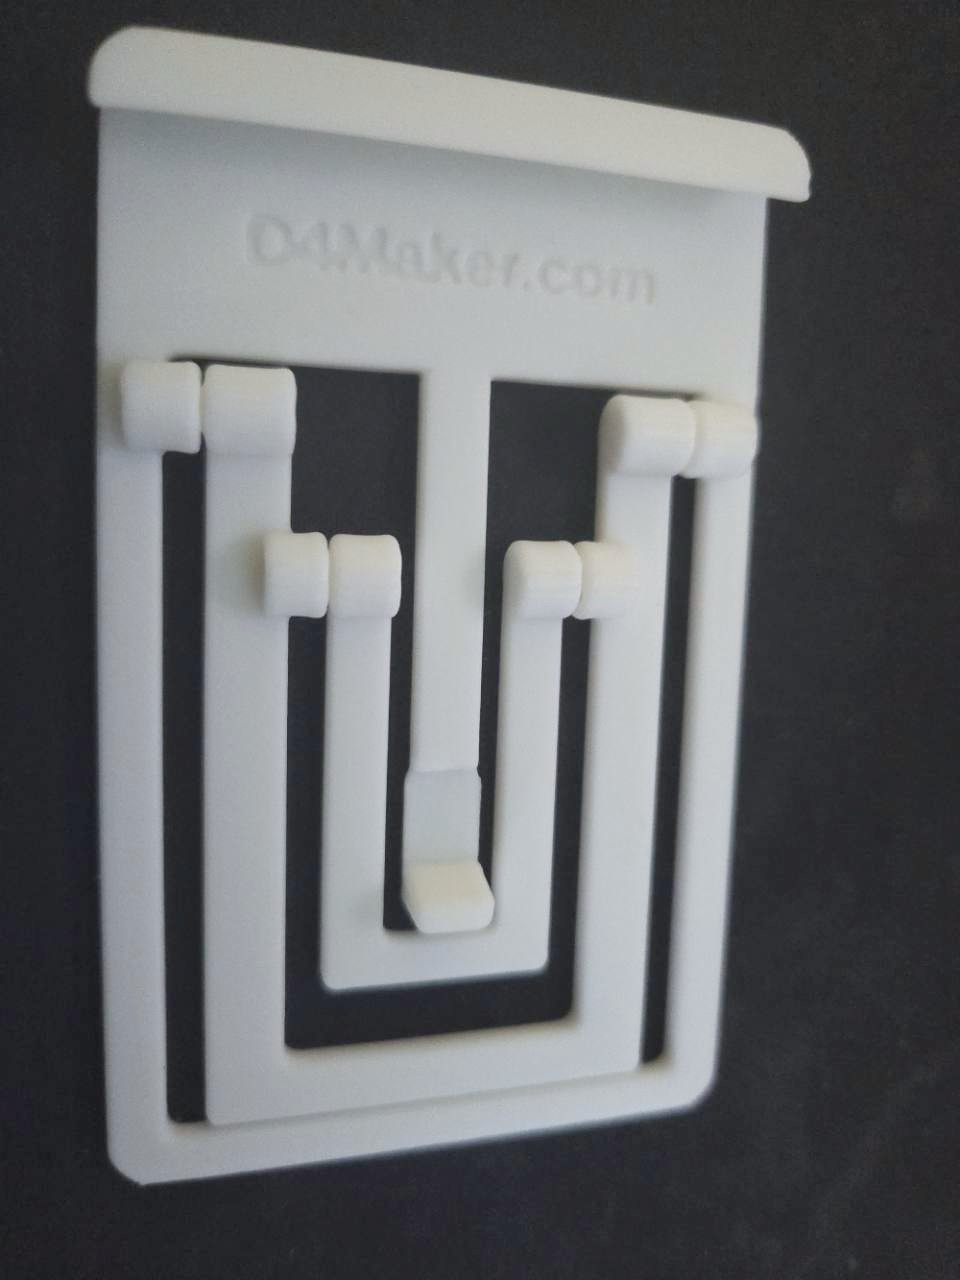
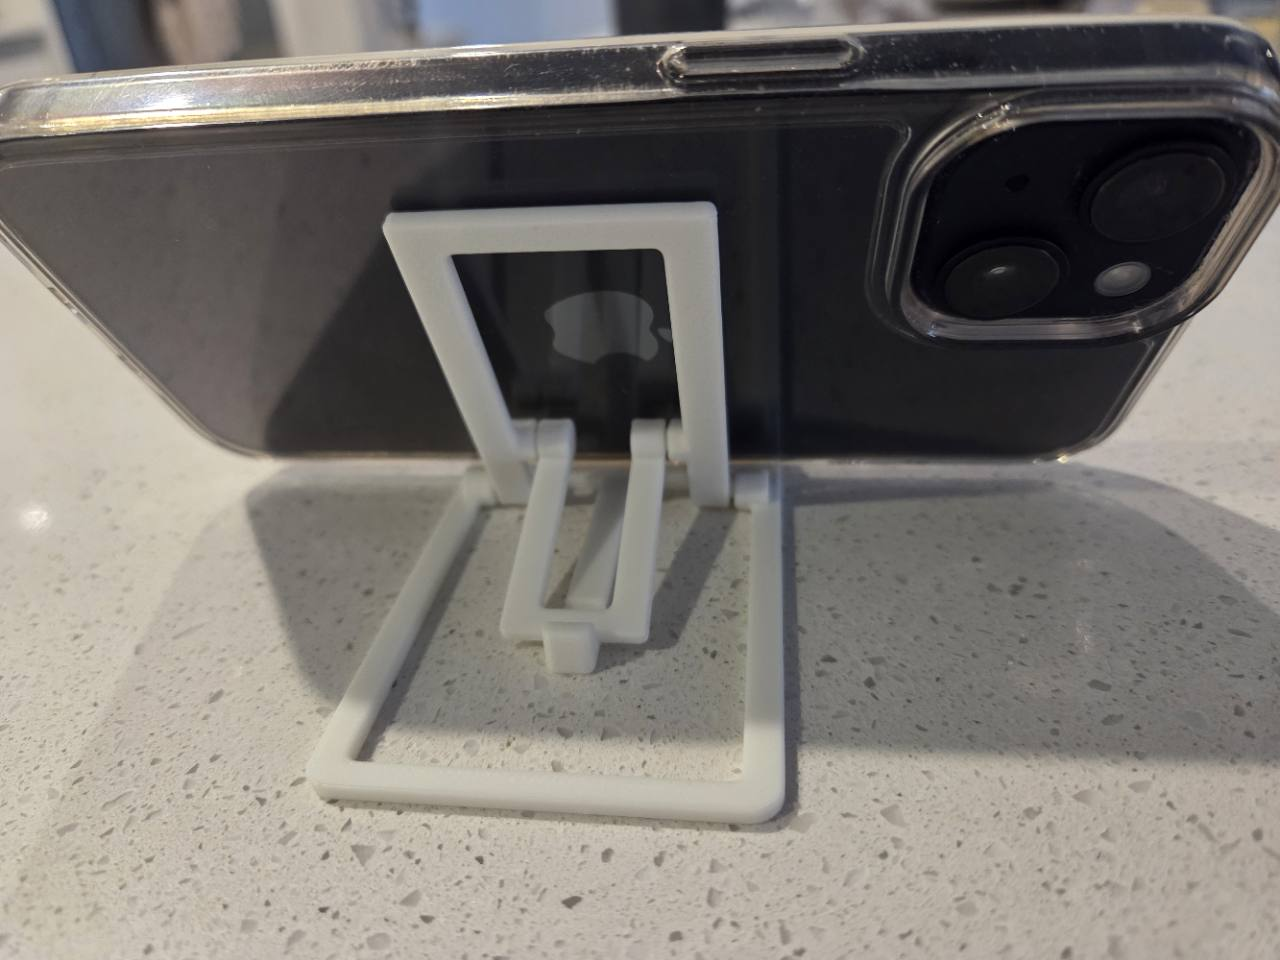
A returning lip still has to leave room for the phone case. A rounded or thick case can sit differently from a thin, flat edge, so the shape matters as well as the quoted thickness. I am sharing the print and the useful changes, not claiming every case will behave like mine.
BUILDBOOK // FROM V0.1 INTENT TO RELEASE 1.1
The record kept us from losing the useful bits.
This is why I keep a BuildBook. By the sixth revision, “the one with the stronger hinges” is not a reliable filename. The record ties each problem to the change, the print feedback and the bits that should stay alone.
The original V0.1-era brief, including Build Book V0.1.1, describes the ambition. A01–A04 below are prototype labels; 1.0 and 1.1 are later model release labels. They are different kinds of version number, not six neat increments of the original document.
- A01 · Prove the folding layout
A frame, backing and nested brace printed together. The first print worked, but short hinge ends and a low catch showed where the next work belonged.
- A02 · Keep the hinges engaged
Longer hinge ends, a higher catch and a longer backing. Print feedback said the hinges were stronger and less prone to coming out.
- A03 · Put more plastic into the frame
A 2.6 mm flat body, wider frame support and a higher lip/catch. The floor underneath the catch stayed thin.
- A04 · Simplify the seating area
Remove the broad ramp, rebalance the nested frame widths and keep the lip growing directly from the base.
- 1.0 · Refine the finish
Rounded corners, softened edges, a 15° outward lip and plain/branded versions. The print was more stable; portrait case grip still needed attention.
- 1.1 · Release the returning lip
A 9 mm lip with a 45° inward upper return and a 6.4 mm catch. This is the printed, photographed version now listed on Creality.
The lesson is not that every small stand needs a mountain of paperwork. A few clear notes kept “lengthen” separate from “thicken”, kept the floor that already worked, and made it possible to connect the final photos to the right model.
A short print, with the numbers labelled properly.
The development baseline is a Creality K2 Pro, PLA and a standard 0.4 mm nozzle. Print flat in the supplied layout with supports off. Start with 0.20 mm layers and a PLA profile that gives clean gaps between moving parts; that is a starting recommendation, not a recovered copy of every setting in the cloud slice.
The supplied Creality Cloud preview estimates 23 minutes 59 seconds, 10.77 g and 3.61 m of filament. Those are slicer estimates, not a stopwatch result or a weighed part. Printer, profile and variant can change them.
Let the print cool, gently check the hinges, lift the backing and brace slightly beyond the working angle, then seat the brace and lower the backing into place. Remove the phone and lift slightly to release before folding. Do not force a stuck hinge or spread the sides to free it.
There is a plain version and a single-colour D4Maker.com version with recessed lettering. Keep PLA away from hot-car temperatures, and check the phone sits securely on a level surface before letting go.